You'll need:
- one LED
-10 microfarad capacitor
-an AVR (in my case an attiny85)
-an Arduino board (in my case Arduino UNO)
-some wires
First of all open the Arduino IDE and upload the ArduinoISP sketch (you can find it in File>Examples)
If you are using arduino 1.0 software check that in the void heartbeat() there is a line that says delay(20) if not change it.
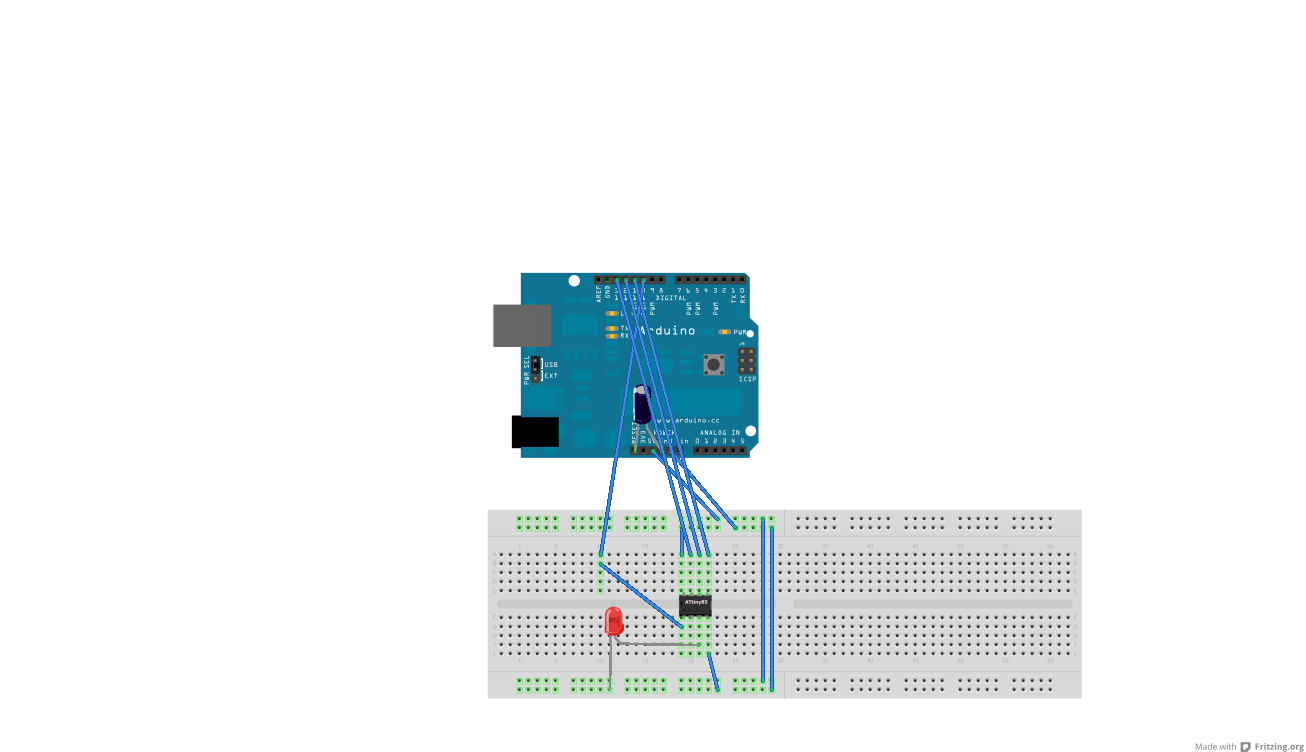
When you have uploaded it to Arduino disconnect the board from pc and connect your avr like this:
-Arudino GND to AVR GND
-Arduino 5v to AVR VCC
-Arduino pin 10 to RST pin on AVR
-Arduino pin 11 to MOSI pin on AVR
-Arduino pin 12 to MISO pin on AVR
-Arduino pin 13 to SCK pin on AVR
-10 microfarad capacitor between GND and Reset on Arduino
If you are using an Attiny85/45/13 it should look like this:
Now hardware side everything it's done.
To compile and upload the code for the AVR we need a software like WinAVR.
Download and install it, then create a C source file with your code in my case this:
#include <avr/io.h>
#define F_CPU 1000000UL
#include <util/delay.h>

int main(void) {
    int n;
    DDRB |= ( 1 << 4 );
    while (1) {
        PORTB &= ~(1 << 4 );
        _delay_ms(1000);
        PORTB |= ( 1 << 4 );
        _delay_ms(1000);
    }
    return 0;
}
Now you're ready to compile and upload your code:
-connect arduino to USB
-navigate to code folder using cd command
-compile your code using these commands:
for attiny13:
avr-gcc -g -Os -c -mmcu=attiny13 test.c
avr-gcc -mmcu=attiny13 test.o -o test.elf
avr-objcopy -O ihex -R .eeprom test.elf test.hex
for attiny85/45:avr-gcc -g -Os -c -mmcu=attiny85 test.c avr-gcc -mmcu=attiny85 test.o -o test.elf avr-objcopy -O ihex -R .eeprom test.elf test.hex
check this for more commands.
-upload your code with this command:
avrdude -P COM4 -p t13 -c avrisp -b 19200 -U test.hex If you're using a different port change COM4. Now everything it's done and the AVR should be programmed.


I hope you like this post, if you have any question comment or send me an e-mail todamianoandre@gmail.com
Bye, Dami
Nessun commento:
Posta un commento